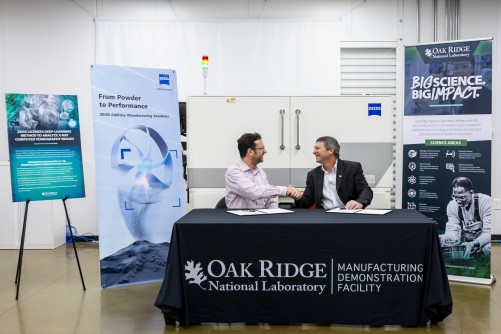
A licensing agreement between the Department of Energy’s Oak Ridge National Laboratory and research partner ZEISS will enable industrial X-ray computed tomography, or CT, to perform rapid evaluations of 3D-printed components using ORNL’s machine learning algorithm, Simurgh. Incorporating machine learning into CT scanning is expected to reduce the time and cost of inspections by more than ten times while improving quality.
The licensing is part of a five-year research collaboration between ORNL and ZEISS, supported by DOE’s Advanced Materials and Manufacturing Technologies Office and a Technology Commercialization Fund award. The research has focused on using CT scanners and other measuring devices to see inside 3D-printed parts to check for cracks and other defects during the manufacturing process.
One of the challenges to broader adoption of 3D printing is how to examine a part to ensure it contains no hidden flaws that could affect performance. Nearly all products have some level of material flaws; however, traditional manufacturing techniques are backed up by decades of experience that let manufacturers know what to expect from items they make using casting, forging, machining and similar techniques. But the unique nature of 3D printing requires a different approach to examining parts, using advanced characterization techniques to understand the distinct features inside an item.
That’s where CT comes into play.
“CT is a standard nondestructive technique used in a multitude of different industries to ensure the quality of the component that is being produced,” said ORNL researcher Amir Ziabari. “But CT is traditionally an expensive and time-consuming process. The challenge is how can we leverage what we know of physics and technology to speed up the CT process to allow it to be more broadly adopted by industry.”
The research is being performed at DOE’s Manufacturing Demonstration Facility at ORNL. The facility is home to the MDF Consortium, a nationwide group of collaborators working with ORNL to advance the state of the art in U.S. manufacturing technology under the guidance of DOE’s Advanced Manufacturing and Materials Technologies Office.
ZEISS Industrial Quality Solutions is a leading manufacturer of multidimensional metrology solutions. These include coordinate measuring machines, optical and multisensor systems, 3D X-ray metrology and microscopy systems for industrial quality assurance. By developing solutions specifically for additive manufacturing, from process qualification and ensuring printer equivalency, to in-process monitoring for fully automated analysis of defect types, characteristics and patterns, ZEISS is constantly working toward quality consistency and repeatability.
“ZEISS and ORNL have a long partnership that has led to the development of innovative solutions for automated analysis and qualification,” said Paul Brackman, additive manufacturing manager at ZEISS. “We are now looking to further improve process development and qualification for additive manufacturing, to enable large-scale adoption and the shift from prototyping to manufacturing.”
In the characterization lab at the MDF, ZEISS has equipment including industrial computed tomography systems and scanning electron microscopes that are being used to look for the slightest defects in 3D-printed parts. The scan is only the first step, however. The data from the scan must run through complex analytics to determine where flaws are located. This process requires a lot of computing horsepower, which equates to time and cost. The Simurgh framework uses deep learning to speed up the scanning and analysis time significantly while providing even more accurate results.
This kind of highly accurate characterization is critical for high-value parts that must operate in extreme environments where failure is not an option. ORNL used CT scanning techniques to certify the performance of nuclear fuel assembly brackets that were inserted into the Browns Ferry Nuclear Plant in Alabama in 2021, the first time a 3D-printed part has ever been placed inside a nuclear reactor. CT characterization was also critical to creating 3D-printed turbine blades that were recently tested in a land-based engine where blades spin at speeds of up to 12,000 revolutions per minute in an environment that can top 800 degrees Celsius. The blades withstood the harsh environment of the turbine and performed exactly as expected.
“Understanding what type of defects might be present is incredibly important for understanding material behavior,” said MDF Director Ryan Dehoff, who led the nuclear bracket development. “In these types of parts, any defect or tiny pore in the material could result in a catastrophic failure.”
ORNL is also investigating how CT scanning can be expanded into additional industries — such as microelectronics and batteries — that do not currently utilize the technique. This type of characterization could enable breakthroughs in fields that will be critical to the clean energy transition.
Current CT scanning technology limits the size, shape and type of materials that can be scanned. For manufacturers, it makes sense to use the technique for small numbers of high-value components like turbine blades. It also makes sense for validating a small number of parts from a larger run, extrapolating from the test batch to see how the entire run will perform.
But the ORNL and ZEISS team plan to reduce the time and cost of CT scanning, allowing it to become as common as a visual inspection might have been for parts flowing off an assembly line decades ago.
“My ultimate goal, what I would like to achieve, is to make this so fast that we can put this in a production line so every part can be CT scanned rapidly and reliably,” Ziabari said. “If we can get there, that would be a game-changing development that would allow 3D printing to really fulfill its potential.”
Subscribe to AM Chronicle Newsletter to stay connected: https://bit.ly/3fBZ1mP
Follow us on LinkedIn: https://bit.ly/3IjhrFq
Visit for more interesting content on additive manufacturing: https://amchronicle.com


